...
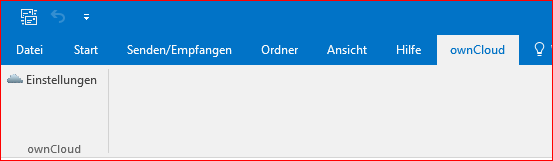
Default Configuration "Settings" of the Outlook- Add-In
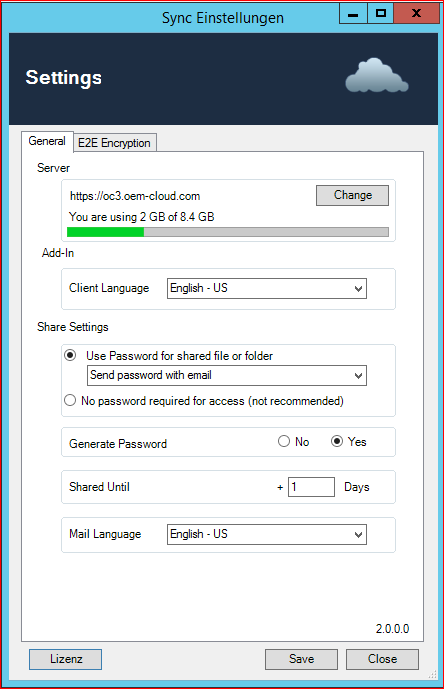
- Server:
- Enter a valid ownCloud/epiKshare Server Ardesss, username and password
- overview of your used storage
- Add-In: Change the Add-In's Language
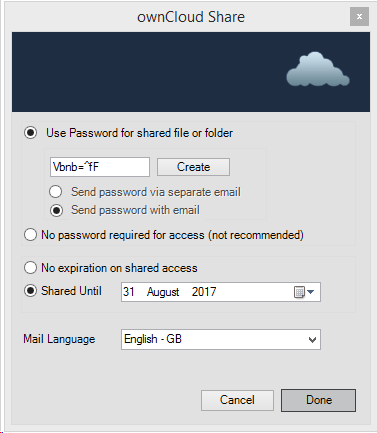
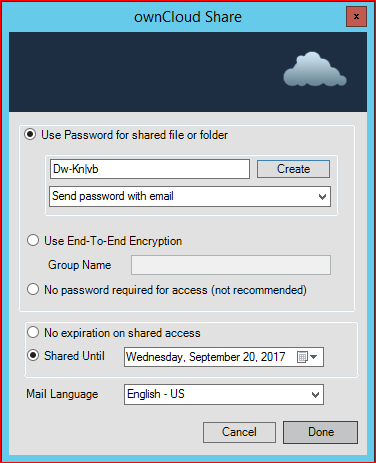
- Share Setting:
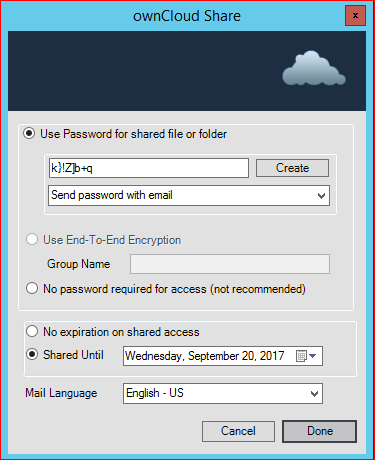
- Send password via separate email. When you share a file or folder, a separate E-Mail with a Password will be created in the background and sent automatically after creation
- !!Attention!! This option only works when the receipients E-Mail Address is a known contact or saved in you Address Book.
- Send password with email.
- This option will send the file or folders passwort within the same email
- No automatic Password sending
- This Option use a password, but it dosn`t send the password by mail
- Send password via separate email. When you share a file or folder, a separate E-Mail with a Password will be created in the background and sent automatically after creation
- Generate Password: When this option is enabled, a strong password will be created automatically
- Shared Until: The Share will be available for this number of days by default
- Mail Language: A pre-written text is inserted into the email in the selected language.
...
- Open a new email (In case you use Microsoft Office 2013/2016 pop-out the Message window)
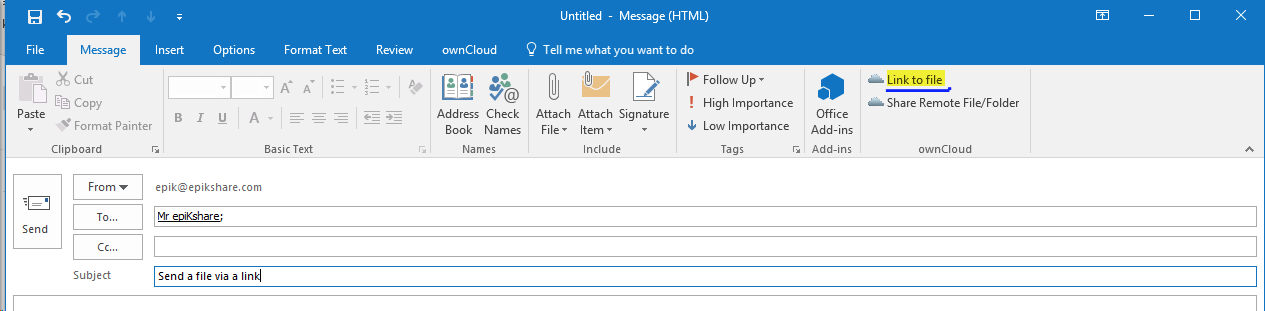
- Select "Link to file"
- Select the file
- Adjust or accept the sharing options
- Click Done
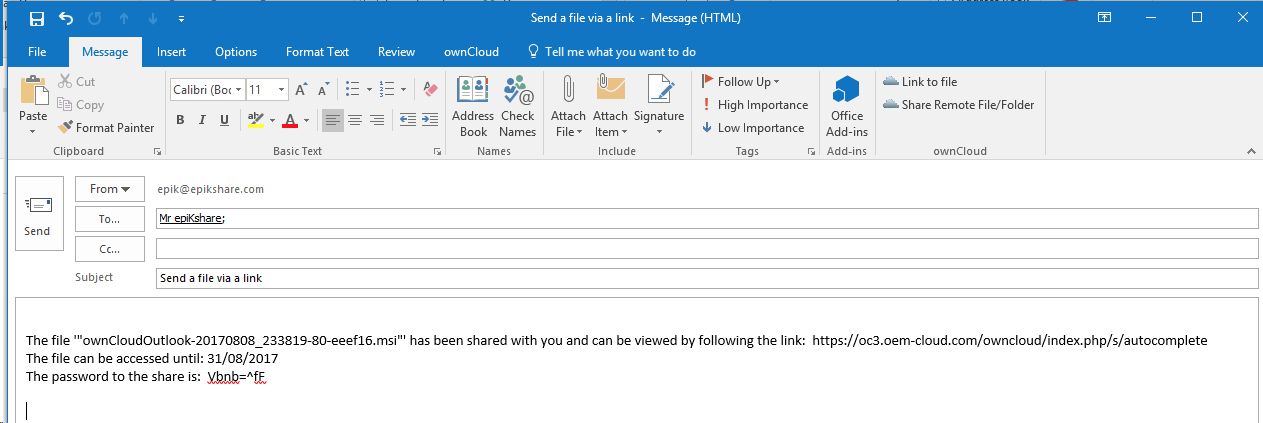
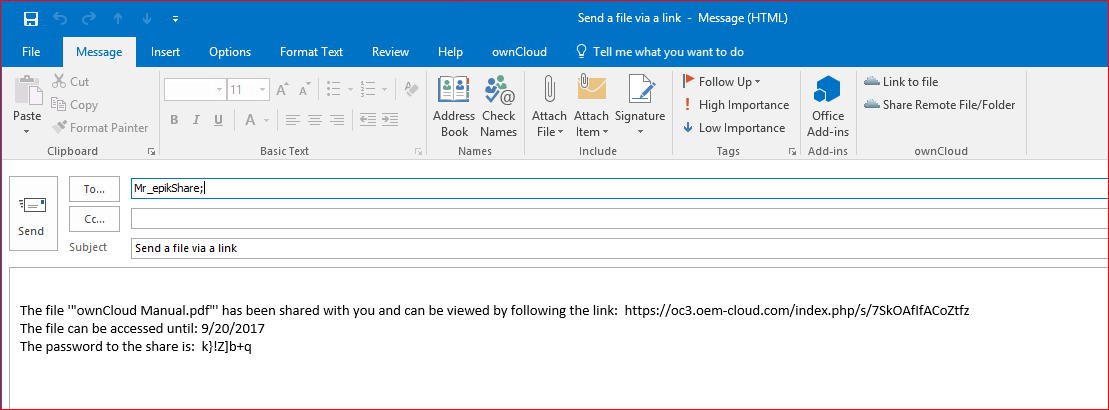
- The created email includes:
- Link to the shared file
- How long the share is available
- The password to access the link
- Now you can send the email
- The shared file will be uploaded in variable junk sizes
...
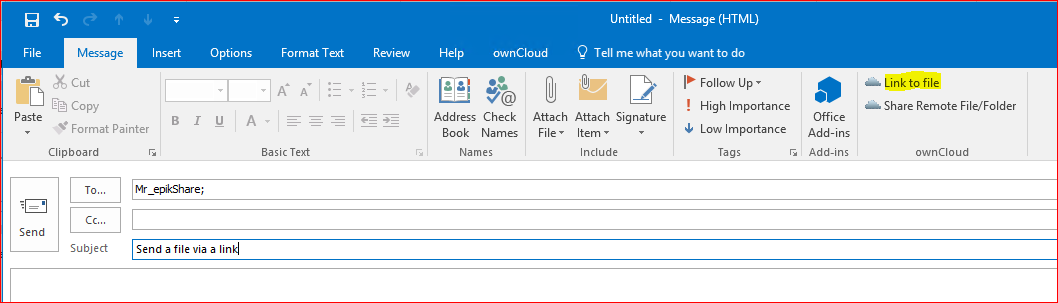
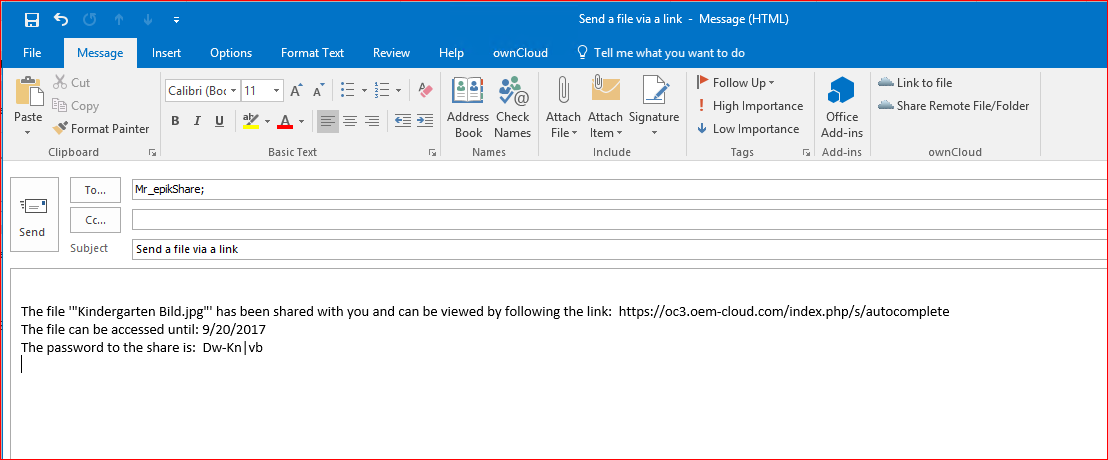
- Open a new email (In case you use Microsoft Office 2013/2016 Pop Out the Message window)
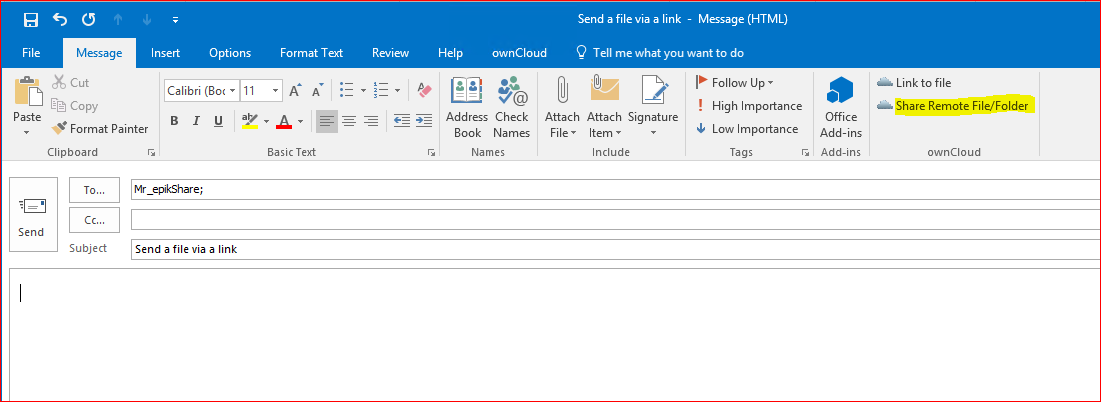
- Select "Share Remote File/Folder"
- The Outlook Add-In will browse via WebDav on you ownCloud/epiKshare Server
...
- Select the file/folder and accept with Ok
- Adjust or accept the sharing options
- Click Done
- The created email includes:
- Link to the shared file/folder
- How long the share is available
- The password to access the link
- Now you can send the email
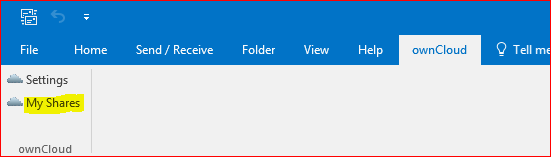
My Outlook Shares
Check the Status of your Shares
- Open the "My Shares"-window (Found in the Add-In Tab)
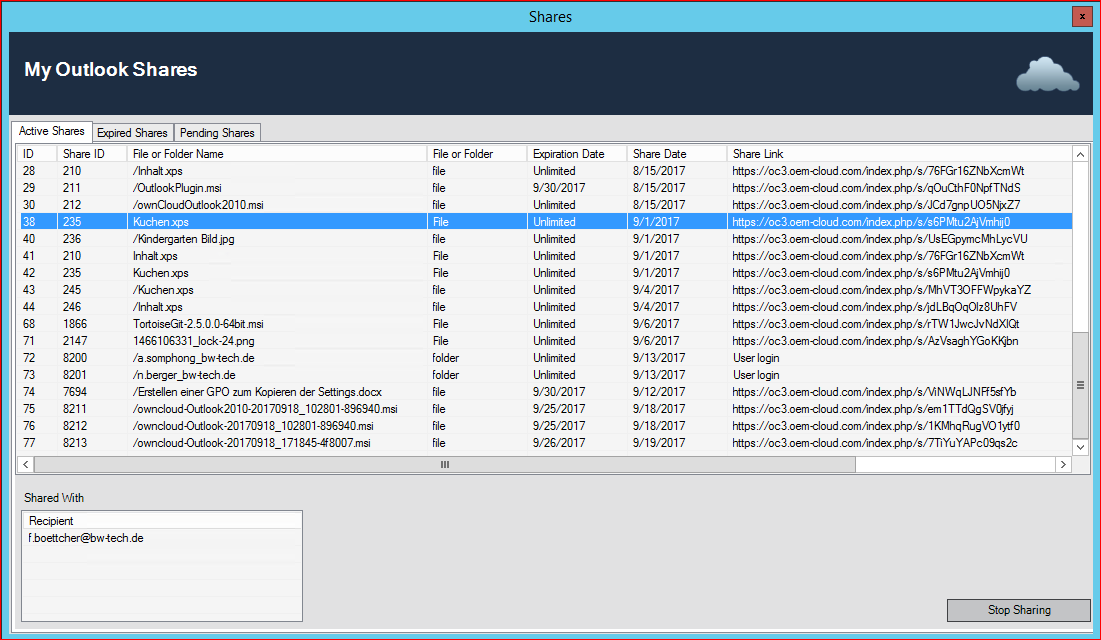
- Active Shares:
- Shared file or Folder Name
- Type of the share (file or folder)
- Expiration Date of the share
- Share Date
- Link to the shared file/Folder
- Recipient of the selected file or Folder share
- Button "Stop Sharing" to stop the selected share
- Expired Shares
- Shared file or Folder Name
- Type of the share (file or folder)
- Expiration Date of the share
- Share Date
- Link to the shared file/Folder
- Recipient of the selected file or Folder share
Troubleshooting
Check the Status of the E-Mails
...
If everything was correct check with an administrator to verify the version of the cloud server.