Initial Setup

- Open Settings
- Click on "Change"
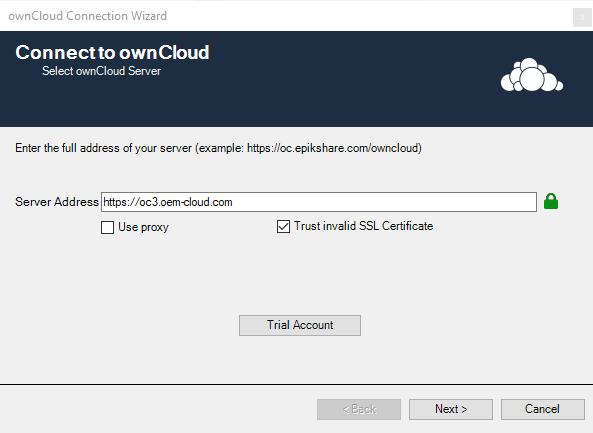
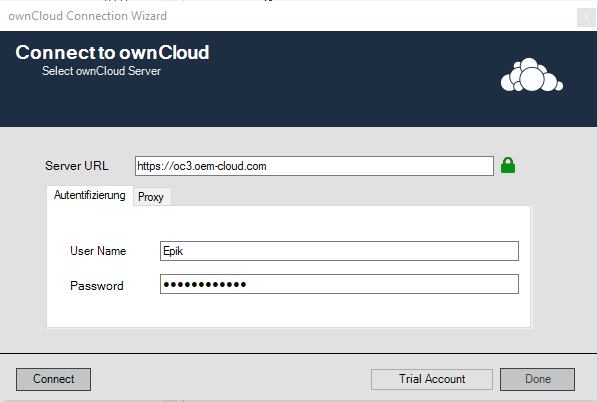
- Enter the address of your ownCloud/epiKshare Server
- Check "Use proxy" if you use a proxy
- Check "Trust invalid SSL Certificate" if you use a self signed certificate
- Click "Next"

- Choose your Authentication
- Click "Next"
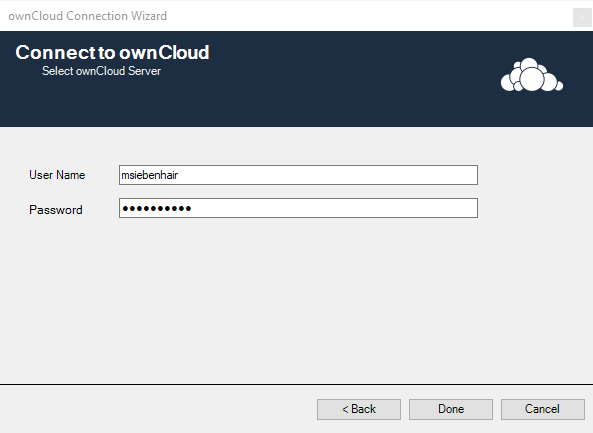
- Enter your User Name and your Password
- Click "Done"
If you use a proxy with username and password, select Proxy -> Custom
- After a successful connection test, your license is being verified and if it fails you will be sent to the License Dialog
- To install a valid license or activate a demo license click OK
License Setup
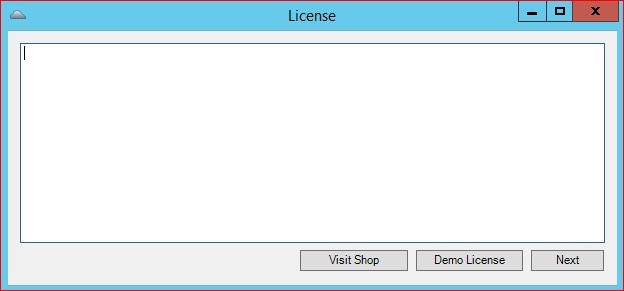
- Insert a valid license key or activate a "Demo Key"
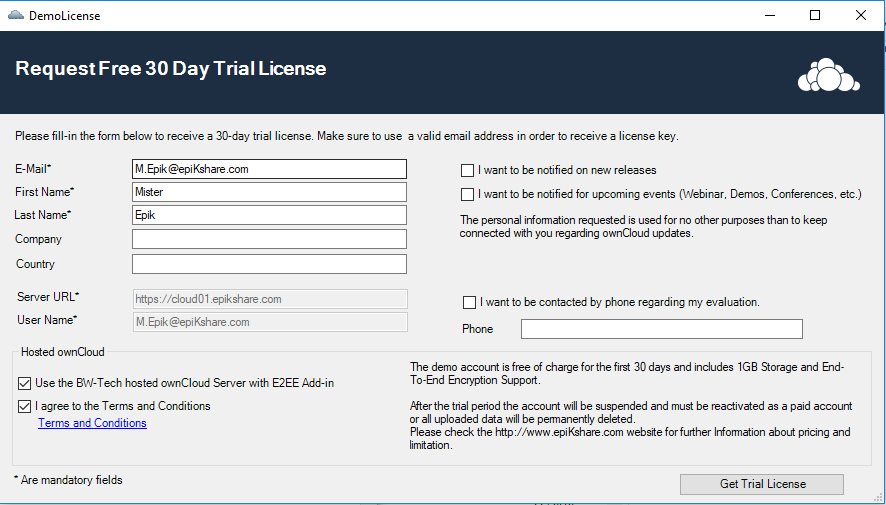
- Request your free 30Days Trial License
- Click "Next"
FAQ
I am receiving the Message "Connection Failed"
This means that we cannot connect to the cloud server.
- Check your internet connection (try connecting to the cloud server using your web browser)
- Test your credentials
- Make sure you entered the correct proxy settings
- When the initial connection was successful you should see the green message "Connection Successful"
- Restart your Microsoft Outlook
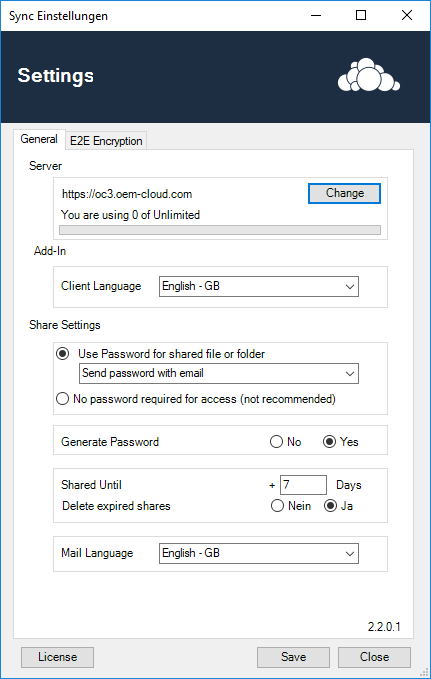
Configuration Settings
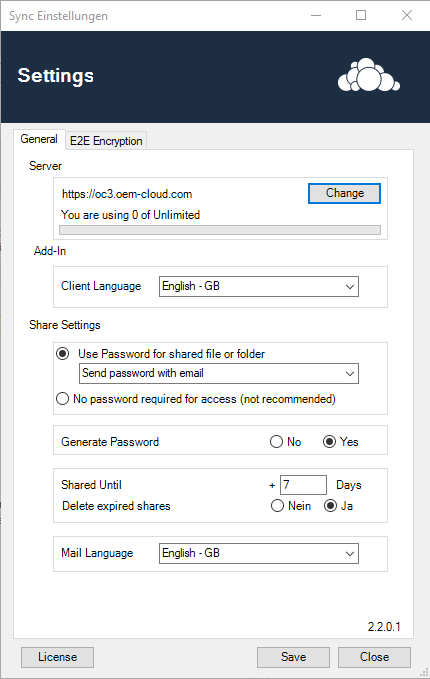
- Server:
- Enter a valid ownCloud/epiKshare Server Address, username and password
- overview of your used storage
- Add-In: Change the Add-In's Language
- Share Setting:
Send password via separate email. When you share a file or folder, a separate E-Mail with a Password will be created in the background and sent automatically after creation
- Send password with email.
- This option will send the file or folders passwort within the same email
- No automatic Password sending
- This Option use a password, but it dosn`t send the password by mail
- Generate Password: When this option is enabled, a password will be created automatically for a new share
- Shared Until: The Share will be available for this number of days by default
- Mail Language: A pre-written text is inserted into the email in the selected language (also used for the password mail)